TLDR:
Copy code and use by writing
textToAddEmoji.Emojify();
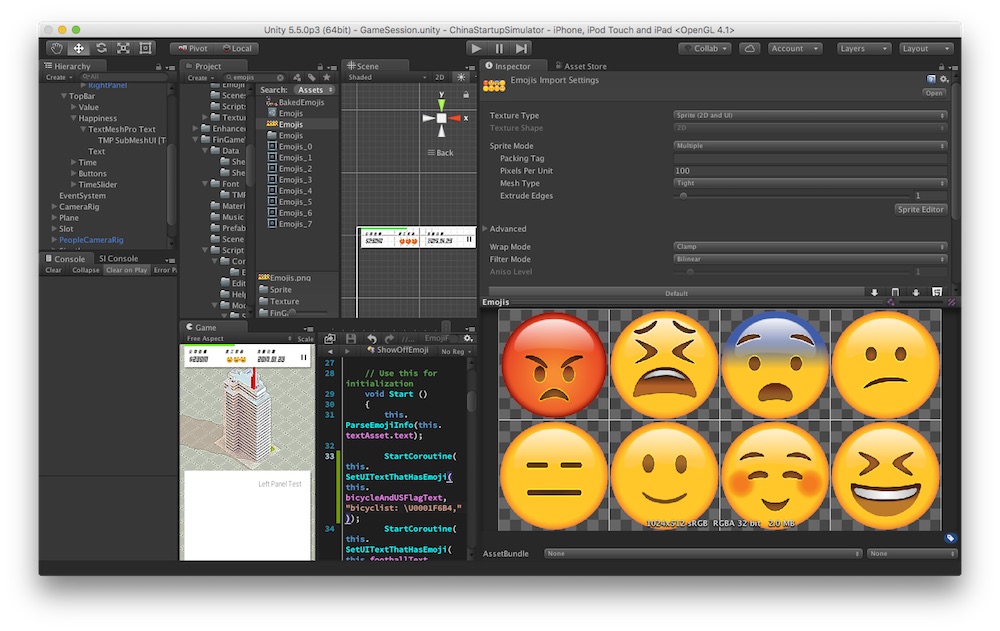
最近在做一个小游戏,一开始只需要在某些文字的地方展示 Emoji 显示人物心情,所以直接用了 TextMesh Pro 的 Sprite 功能,自己拼了 8 个 Emoji:
然后选中 Texture 后新建一个 Sprite Asset,设置为默认 Sprite Asset 后在对应的 TextMesh Pro UGUI 脚本里面设置 text 属性:
<sprite=1><sprite=1><sprite=1>
就可以显示序号对应的表情了。
但是这个方案的问题在于,TMP 作为一个矢量文字显示方案,对中文的支持不是很好,在中英文都有可能出现的地方我还是尽量少用 TMP,转而使用 Unity built-in Text。而且 Unity 本身对 emoji 输入也有问题,不能像正常输入框一样输入即显示,所以还需要一个标记符替代 emoji 序列化在游戏里面。
对于前一个问题我找到了 Unity-UI-emoji,而后一个问题就准备用 Slack 的方案,在 Unity-UI-emoji 的基础上实现了。
Image refernce from slack.
Slack 对这个功能解释如下:"Slack uses the standard emoji codes found at Emoji Cheat Sheet."
Emoji Cheat Sheet 的确提供了我想要的信息,但是是用 Flash 展示的。还好找到了一个 GitHub 仓库 Emoji Alpha Codes,提供了 csv 和 json 两种格式,因此用 MiniJSON 转成 C# 的字典就可以用了。此外还需要反向转换一次,成为 alpha codes 为 key 而 emoji 为 value 的字典。
using System.Linq;
public Dictionary<string,string> InitDict ()
	{
		emojiCodeJSONTextAsset = (TextAsset)Resources.Load(emojiCodeJSONPath,typeof(TextAsset));
		deserializedEmojiCodeJSONObject = (Dictionary<string,object>)MiniJSON.Json.Deserialize(emojiCodeJSONTextAsset.text);

		_reversedCodeEmojiDict = new Dictionary<string, string>();
		List<string> arrayOfAllKeys = deserializedEmojiCodeJSONObject.Keys.ToList();
		foreach (string key in arrayOfAllKeys)
		{
			Dictionary<string,object> subDict =	(Dictionary<string,object>)deserializedEmojiCodeJSONObject[key];
			string code = (string) subDict["alpha_code"];
			string unicodeKey = GetConvertedString(key);
			//Debug.Log ("Key " + code + " ForValue " + unicodeKey);
			_reversedCodeEmojiDict[code] = unicodeKey;
		}
		return _reversedCodeEmojiDict;
	}
private static string GetConvertedString(string inputString)
	{
//有些 emoji 的图片名称带有 '-' ,这里需要拆开为两个 '\U'开头的字串拼接
		char[] chars = { '-' };
		return string.Join(string.Empty, inputString.Split(chars).Select(hex => char.ConvertFromUtf32(Convert.ToInt32(hex, 16))).ToArray());
	}
字典完成了,接下来看 GitHub 这个仓库。Unity-UI-emoji 的解决方案是读取 Text 中的 Emoji 并替换为 emSpace = '\u2001' 以保持字的长度,同时在 Text 层级下生成 RawImage 放置于 emSpace 的位置上,因为所有 emoji 都是打包成一个大贴图的,所以所有 RawImage 还是用的同一个 material,理论上可以节省 Draw Call,不过我也没测试罢了。
但是这个仓库有一个问题,在复杂的 Canvas / Text 条件下生成的Emoji 位置是错的。在我的游戏里测试下,Emoji 经常会跑到界面外。所以需要对 SetUITextThatHasEmoji 这个方法做些修改。这里需要引用到一个 SOF 回答 以及一个 BitBucket 仓库,照着 Unity 仓库源码改改就好了:
// One rawimage per emoji
for (int j = 0; j < emojiReplacements.Count; j++)
{
int emojiIndex = emojiReplacements[j].pos;

if (emojiIndex * 4 < textGen.verts.Count)
{
	GameObject newRawImage = GameObject.Instantiate(this.rawImageToClone.gameObject);
	newRawImage.transform.SetParent(textToEdit.transform);


	Vector2 locUpperLeft = new Vector2(textGen.verts[emojiIndex * 4].position.x, textGen.verts[emojiIndex * 4].position.y);
	Vector2 locBottomRight = new Vector2(textGen.verts[emojiIndex * 4 + 2].position.x, textGen.verts[emojiIndex * 4 + 2].position.y);

	Vector3 mid = (locUpperLeft + locBottomRight) / 2.0f;
	Vector3 size = locBottomRight - locUpperLeft;


	//Vector3 imagePos = new Vector3(textGen.verts[emojiIndex * 4].position.x, textGen.verts[emojiIndex * 4].position.y, 0);

	Rect inputRect = textToEdit.rectTransform.rect;
	// get the text alignment anchor point for the text in local space
	Vector2 textAnchorPivot = GetTextAnchorPivot(textToEdit.alignment);
	Vector2 refPoint = Vector2.zero;
	refPoint.x = (textAnchorPivot.x == 1 ? inputRect.xMax : inputRect.xMin);
	refPoint.y = (textAnchorPivot.y == 0 ? inputRect.yMin : inputRect.yMax);
	Vector2 roundingOffset = textToEdit.PixelAdjustPoint(refPoint) - refPoint;
	IList<UIVertex> verts = textGen.verts;
	FontData fontData = FontData.defaultFontData;
	fontData.font = textToEdit.font;
	float pixelsPerUnit = 0.0f;
	var localCanvas = GameObject.Find("GameCanvas").GetComponent<Canvas>();
	if (!localCanvas)
	{
		pixelsPerUnit = 1.0f;
	}else if (!textToEdit.font || textToEdit.font.dynamic)
	{
		pixelsPerUnit = localCanvas.scaleFactor;
	}else
	{
		pixelsPerUnit = textToEdit.font.fontSize / (float)fontData.fontSize;
	}
	float unitsPerPixel = 1 / pixelsPerUnit;
	int vertCount = verts.Count - 4;
	if (roundingOffset != Vector2.zero)
	{
		mid *= unitsPerPixel;
		mid.x += roundingOffset.x;
		mid.y += roundingOffset.y;
	}else
	{
		mid *= unitsPerPixel;
	}


	Debug.Log ("EMOJI mid X" + mid.x + " Y " + mid.y + " Z " + mid.z);
	newRawImage.transform.localPosition = mid;

	RawImage ri = newRawImage.GetComponent<RawImage>();
	ri.uvRect = emojiRects[emojiReplacements[j].emoji];
	ri.rectTransform.pivot = new Vector2(0.0f,0.0f);
	ri.rectTransform.localScale = Vector3.one;
	ri.rectTransform.sizeDelta = Vector2.one * textToEdit.font.lineHeight * unitsPerPixel;

}
代码很脏,但能用,等做完游戏后这块再重构下。
然后就是给 UnityEngine.UI.Text 加一个方法拓展,我命名为 Emojify();
static public void Emojify (this UnityEngine.UI.Text self)
{
	if (JZEmojiUITextManager.Instance.reversedCodeEmojiDict == null)
	{
		return;
	}
	string currentCodeBasedString = self.text;

	// 使用正则把 emoji alpha code 转换为 对应的 Unicode
	Dictionary<string,string> map = (Dictionary<string,string>)JZEmojiUITextManager.Instance.reversedCodeEmojiDict;
	var regex = new Regex(string.Join("|",map.Keys.ToArray()));
	var newStr = regex.Replace(currentCodeBasedString, m => map[m.Value]);
	// 第一次正则的 Unicode 还没有 Unscape,需要把 '\\' 改为 '\'
	Regex regex1 = new Regex (@"\\U([0-9A-F]{4})", RegexOptions.IgnoreCase);
	var newStrUnescape = regex1.Replace (newStr, match => ((char)int.Parse (match.Groups[1].Value,
		NumberStyles.HexNumber)).ToString ());
	JZEmojiUITextManager.Instance.StartCoroutine(JZEmojiUITextManager.Instance.SetUITextThatHasEmoji(self, newStrUnescape));
}
至于 JZEmojiUITextManager 就是一个简单的单例,用于生成和存放刚才的那个字典,以及把 Unity-UI-emoji 仓库的大部分方法复制了一份。现在就可以直接对某个 Text 组建直接写:
textToAddEmoji.Emojify();
另外我还替换了这个仓库的 Emoji 图片,从 Twitter Emoji 换到了 iOS Emoji,链接为 github.com/iamcal/emoji-data。现在效果如下:
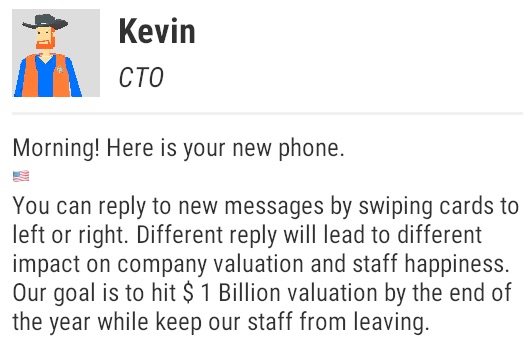
Morning! Here is your new phone.
:flag_us:
You can reply to new messages by swiping cards to left or right. Different reply will lead to different impact on company valuation and staff happiness.
Our goal is to hit $ 1 Billion valuation by the end of the year while keep our staff from leaving.